How to Build a Firewood Shed That Holds a Face Cord — One Weekend, Less than $250
Every year I go through the same routine: I stack firewood in a pile in the backyard, and by February the bottom row is frozen into a block of ice and the top row is soaked. Wood that should burn clean hisses and smokes instead.
So this past August I built a proper firewood shed — 8 feet wide, 16 inches deep, open front, slatted sides, up off the ground on concrete block, with a sloped translucent roof. It holds a standard 4 × 8 face cord of 16-inch splits plus a kindling shelf on top. Materials came to less than $250 at my local yard, and it went together over one weekend with basic tools and about 30 minutes of help from a helper.
Here's how it's built, what it cost, and the handful of things I'd tell anyone before they start.
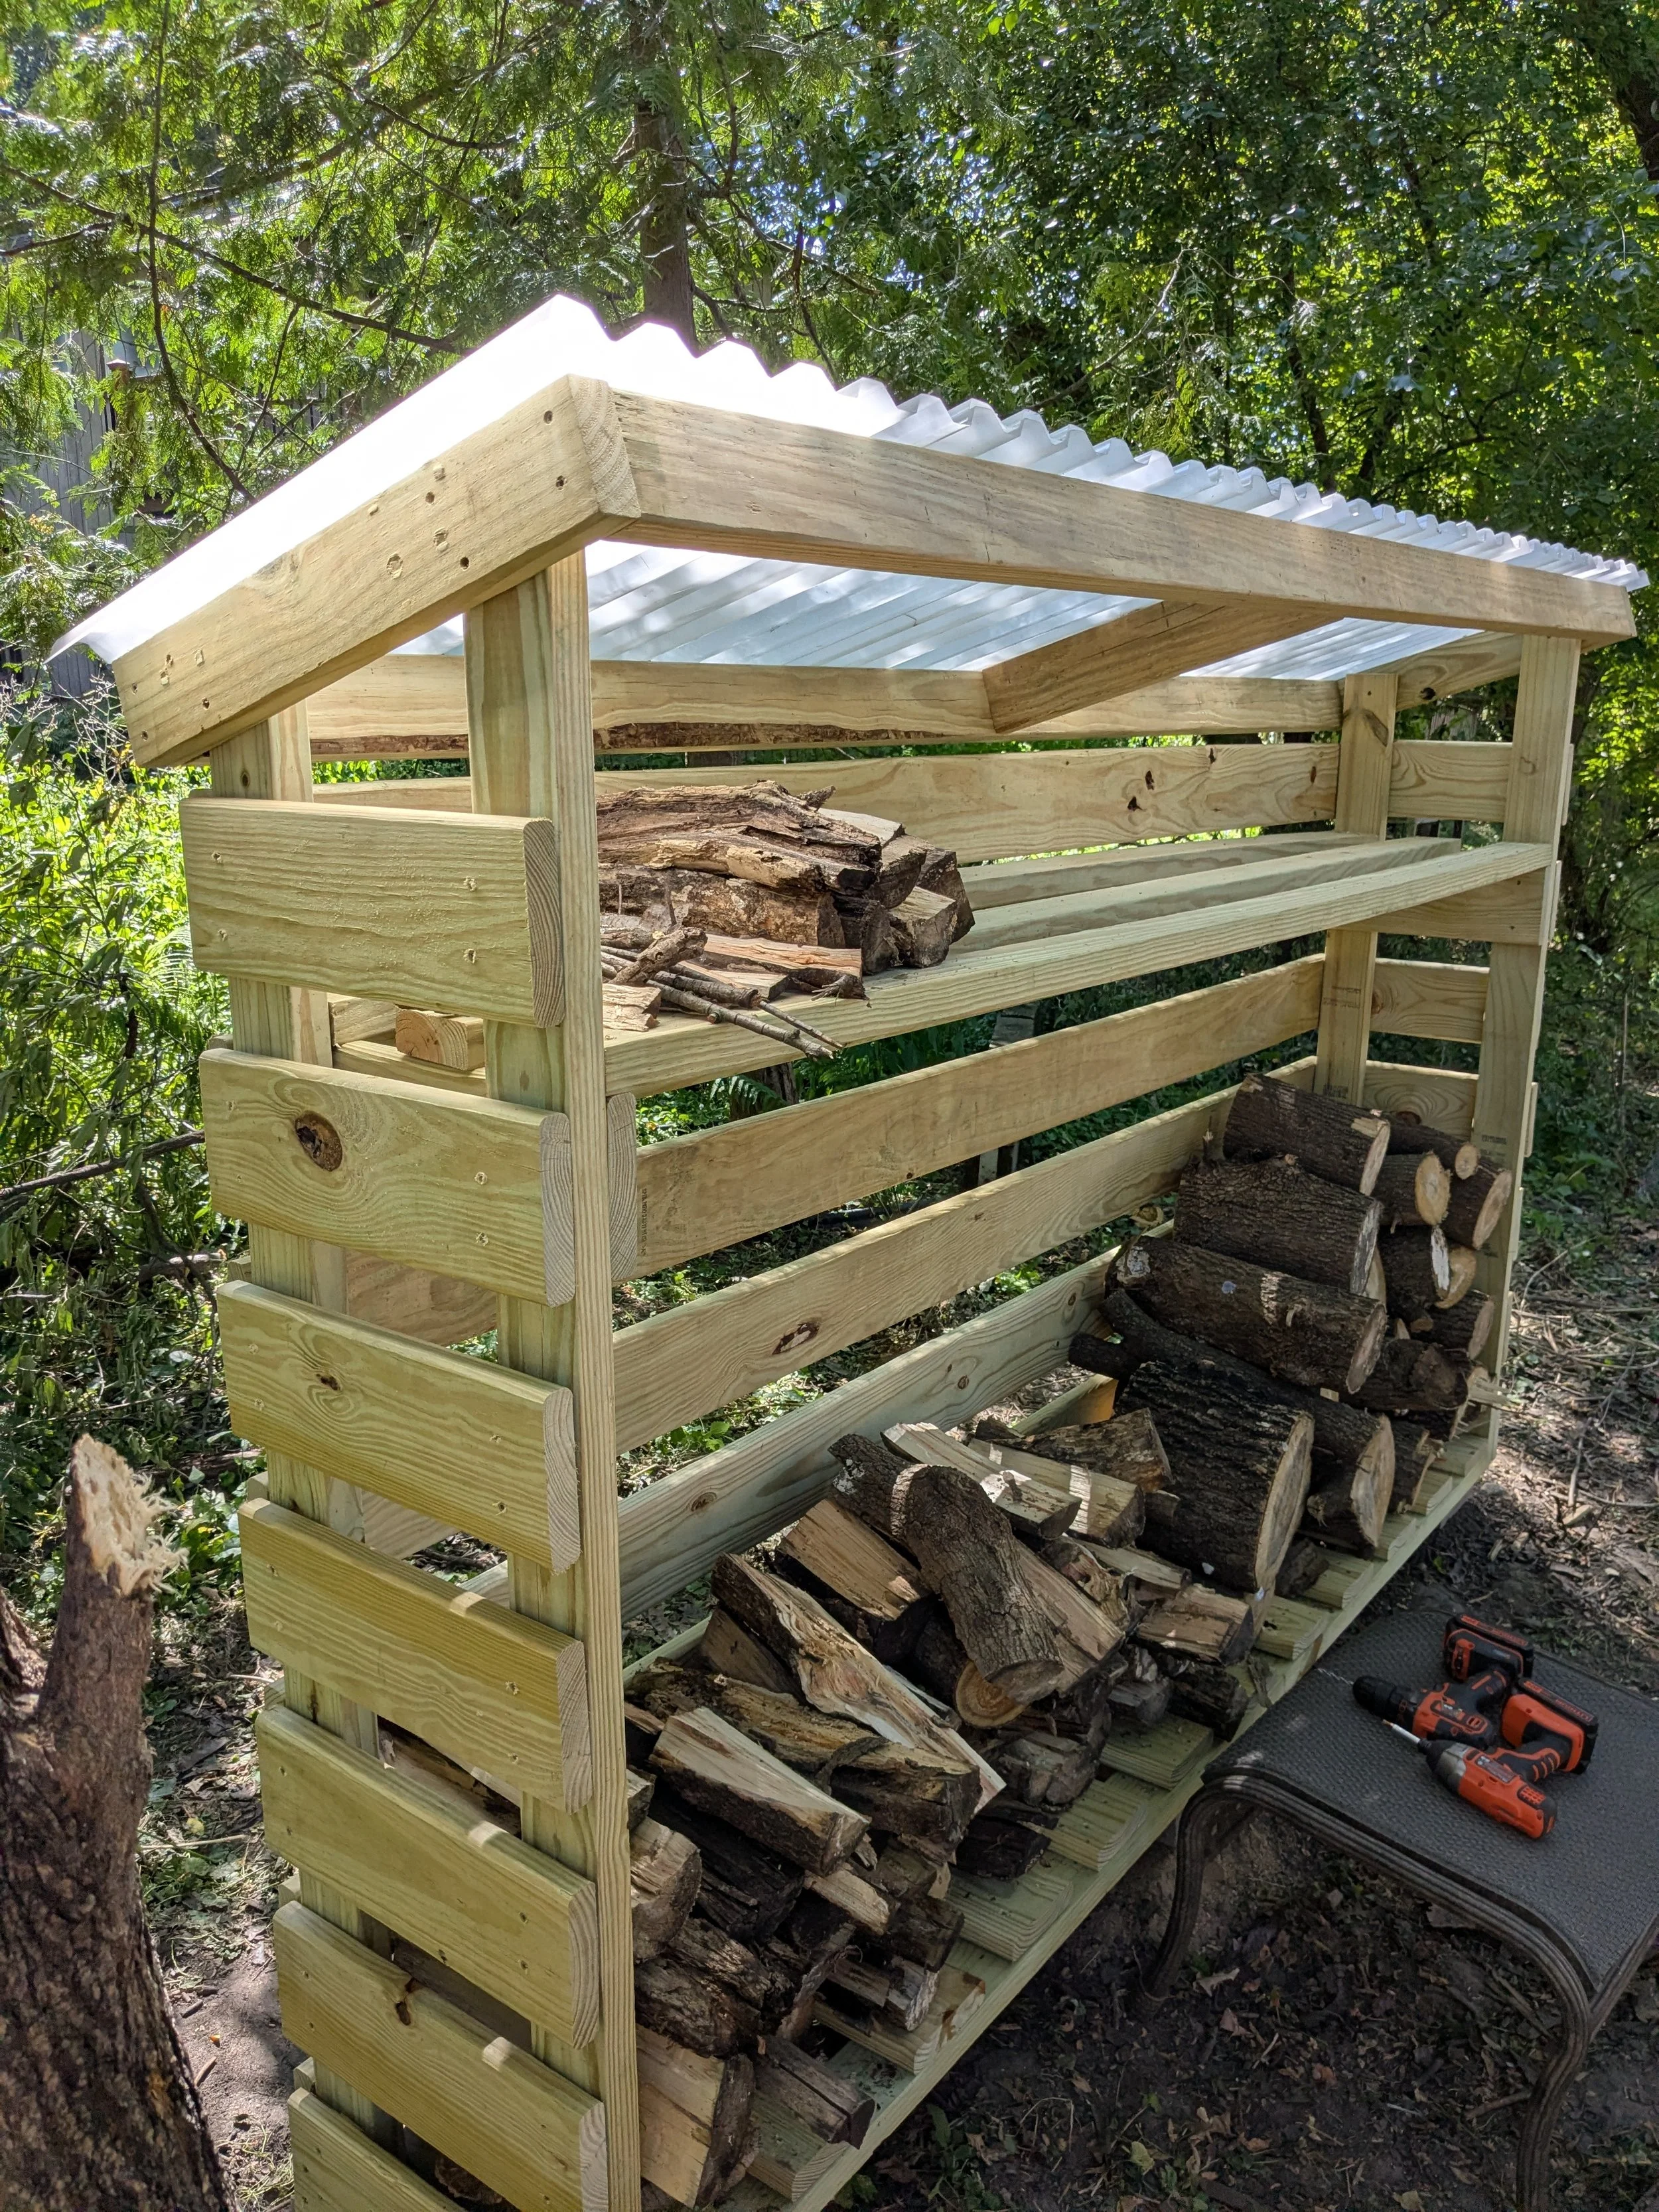
DIY firewood shed made from pressure-treated lumber with slatted sides and a translucent corrugated roof
The Design at a Glance
Overall size — 102 in wide × 22 in deep × 64 in tall at the front
Shed body — 99 in wide × 16 in deep
Capacity — ~40 cu ft, a standard 4 × 8 face cord of 16 in splits
Bonus storage — 96 in × 10½ in kindling shelf
Roof — lean-to, ~14° pitch, translucent corrugated panels
Cost — ~$250
Skill level — beginner, no joinery and no angle cuts
Time — one weekend
Full Build Plans available here.
Why a Woodshed Beats a Tarp
Firewood doesn't dry because it's covered. It dries because moving air pulls moisture out of the end grain. Freshly split hardwood sits around 50% moisture content; it needs to get under 20% before it will burn well. A tarp traps the moisture that comes up out of the ground and holds it against the stack.
Four things make a woodshed work, and every one of them is designed into this build:
The floor is off the ground. Three concrete blocks lift the whole stack out of the mud, the splash-back, and the snow.
The floor is slatted, not solid. Air comes up through the bottom of the pile instead of stopping at it.
The sides and back are slats with gaps. Roughly 2½ inches between boards, which is what lets a breeze cross the stack instead of dying at the wall.
The front is wide open. You grab an armload without unstacking anything, and the prevailing wind gets in.
The roof does one job: keep rain and snow off the top of the pile. It isn't there to seal the wood in.
What It Cost — Real Receipts, August 2026
9 × 2x4 × 8 ft, pressure treated — $54.27
2 × 2x4 × 10 ft, pressure treated — $16.88
10 × 5/4 × 6 × 10 ft deck board — $92.90
2 × 8 ft corrugated roof panel — $38.18
2 boxes × #9 × 2 in deck screws — $17.94
1 box × #10 × 4 in deck screws — $8.97
3 × concrete block — $5.07
Total $234.21
Budget another $25–40 for end-cut preservative, roofing screws with neoprene washers, and a pair of earth anchors. Treated lumber prices swing, so treat this as an estimate rather than a quote.
Tools You'll Need
Nothing exotic. If you own a circular saw, a drill, and a tape measure, you're most of the way there.
Required
Miter saw or circular saw — a miter saw earns its keep here; 28 of the 49 pieces are identical 16-inch slats
Drill/driver with a T25 star bit and a small twist bit for pre-drilling
Tape measure, speed square, pencil
Two or three bar clamps
4 ft level
Helpful
Sawhorses or a portable work table — three of the four sub-assemblies get built flat
Shovel and rake for leveling the site
Oscillating tool or utility knife for trimming roof panels
A helper for about 30 minutes
The Shopping List
One trip to the lumber yard:
9 — 2x4 × 8 ft, pressure treated (AC2/ACQ)
2 — 2x4 × 10 ft, pressure treated
10 — 5/4 × 6 × 10 ft treated deck board ("thick deck")
3 — concrete block, 4 × 8 × 16 in
2 — 8 ft translucent corrugated roof panels
2 boxes — #9 × 2 in exterior deck screws, star drive
1 box — #10 × 4 in exterior deck screws, star drive
~30 — roofing screws with neoprene washers
1 qt — end-cut wood preservative
If you're new to this, buy one extra 2x4 and one extra deck board. You probably won't need them — the cut list was laid out so the offcuts from the uprights become the roof supports — but $15 of insurance beats a second trip.
Affiliate Links to help with your shopping: (under construction)
This post contains affiliate links. If you buy through them I earn a small commission at no cost to you — it helps fund the next build.
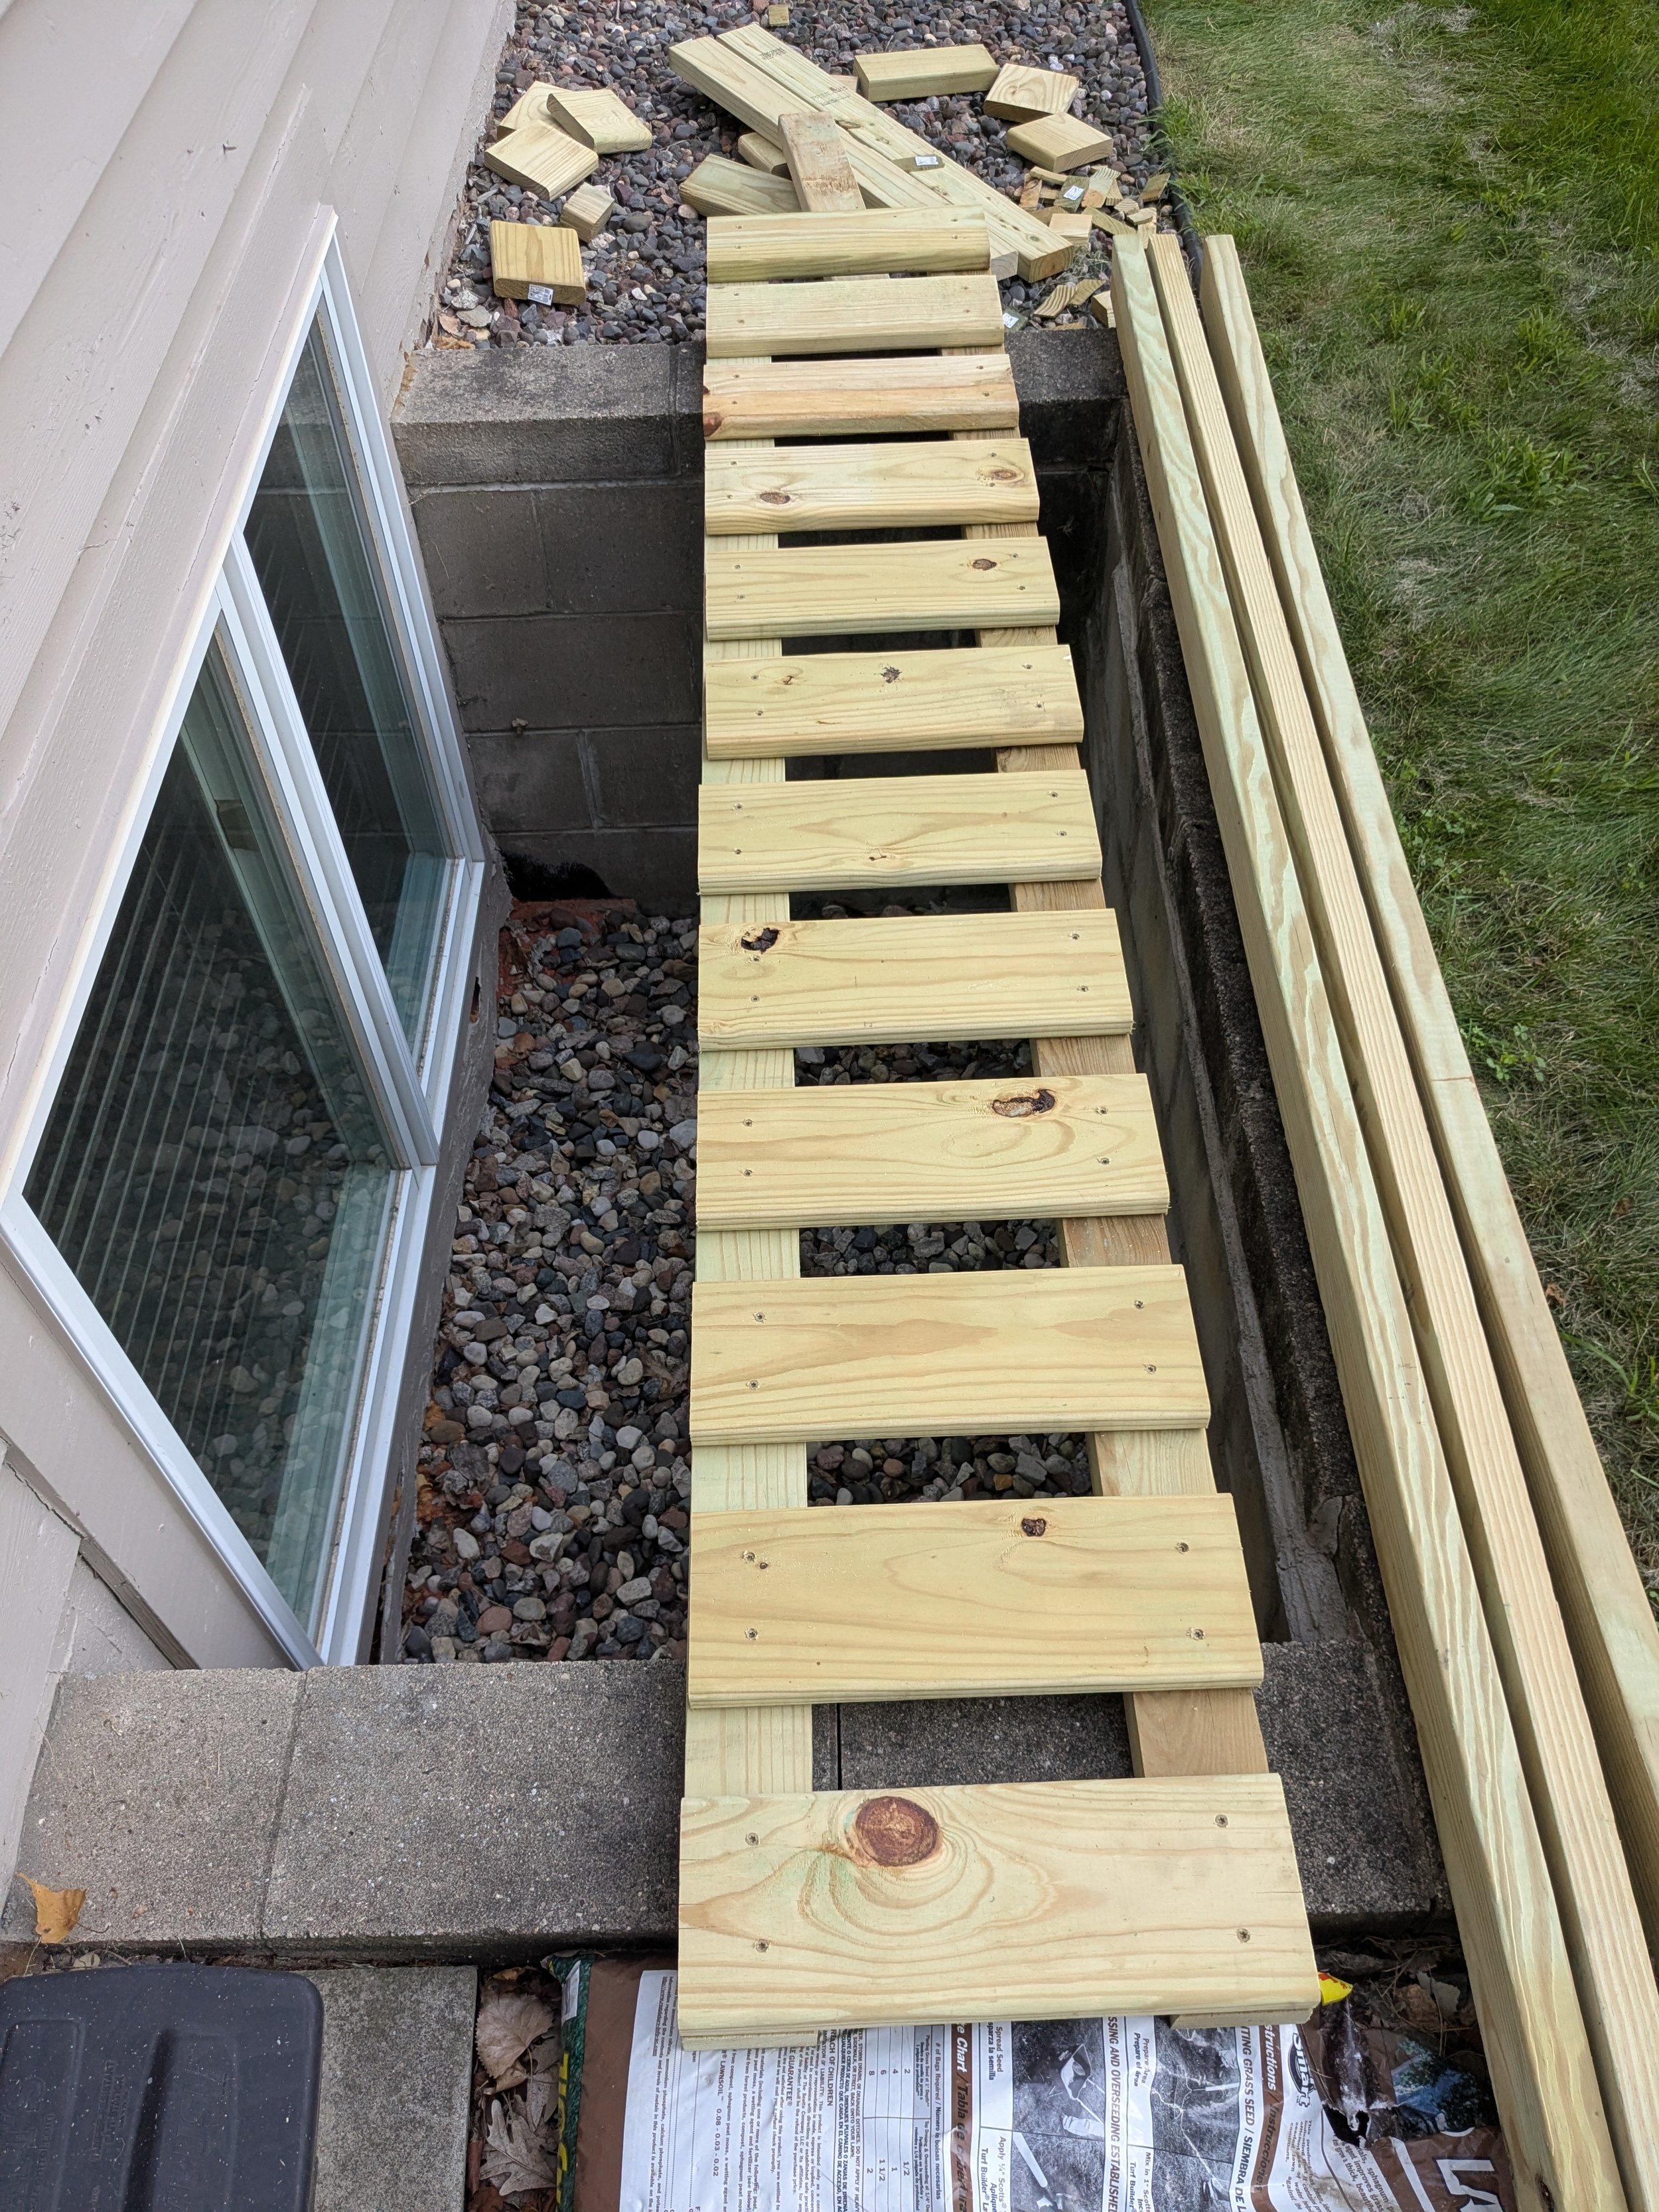
Shed Floor Frame
How It Goes Together
The whole shed breaks into four flat sub-assemblies you build in the garage, then carry out and stand up in about an hour:
1. The floor frame. Two 96-inch 2x4 runners with twelve 16-inch deck-board slats across them. Square it with the diagonals, lay every slat crown-up so water runs off instead of pooling.
2. Two side frames. Each is a 64-inch front upright and a 60-inch back upright joined by seven 16-inch slats. Build them as a mirrored pair so the slats land on the outside on both sides. That four-inch height difference between front and back is what makes the roof slope — there is not one angled cut in this entire build.
3. The roof frame. A flat 102 × 22 inch 2x4 rectangle with a center support. Build it on the bench. Assembling it on a ladder is miserable and completely avoidable.
4. Site, stand, and roof. Level three concrete blocks, set the floor, stand the sides, run seven 99-inch back slats (this is what makes the whole thing rigid), drop the roof frame over the posts, add the kindling shelf, screw down the panels.
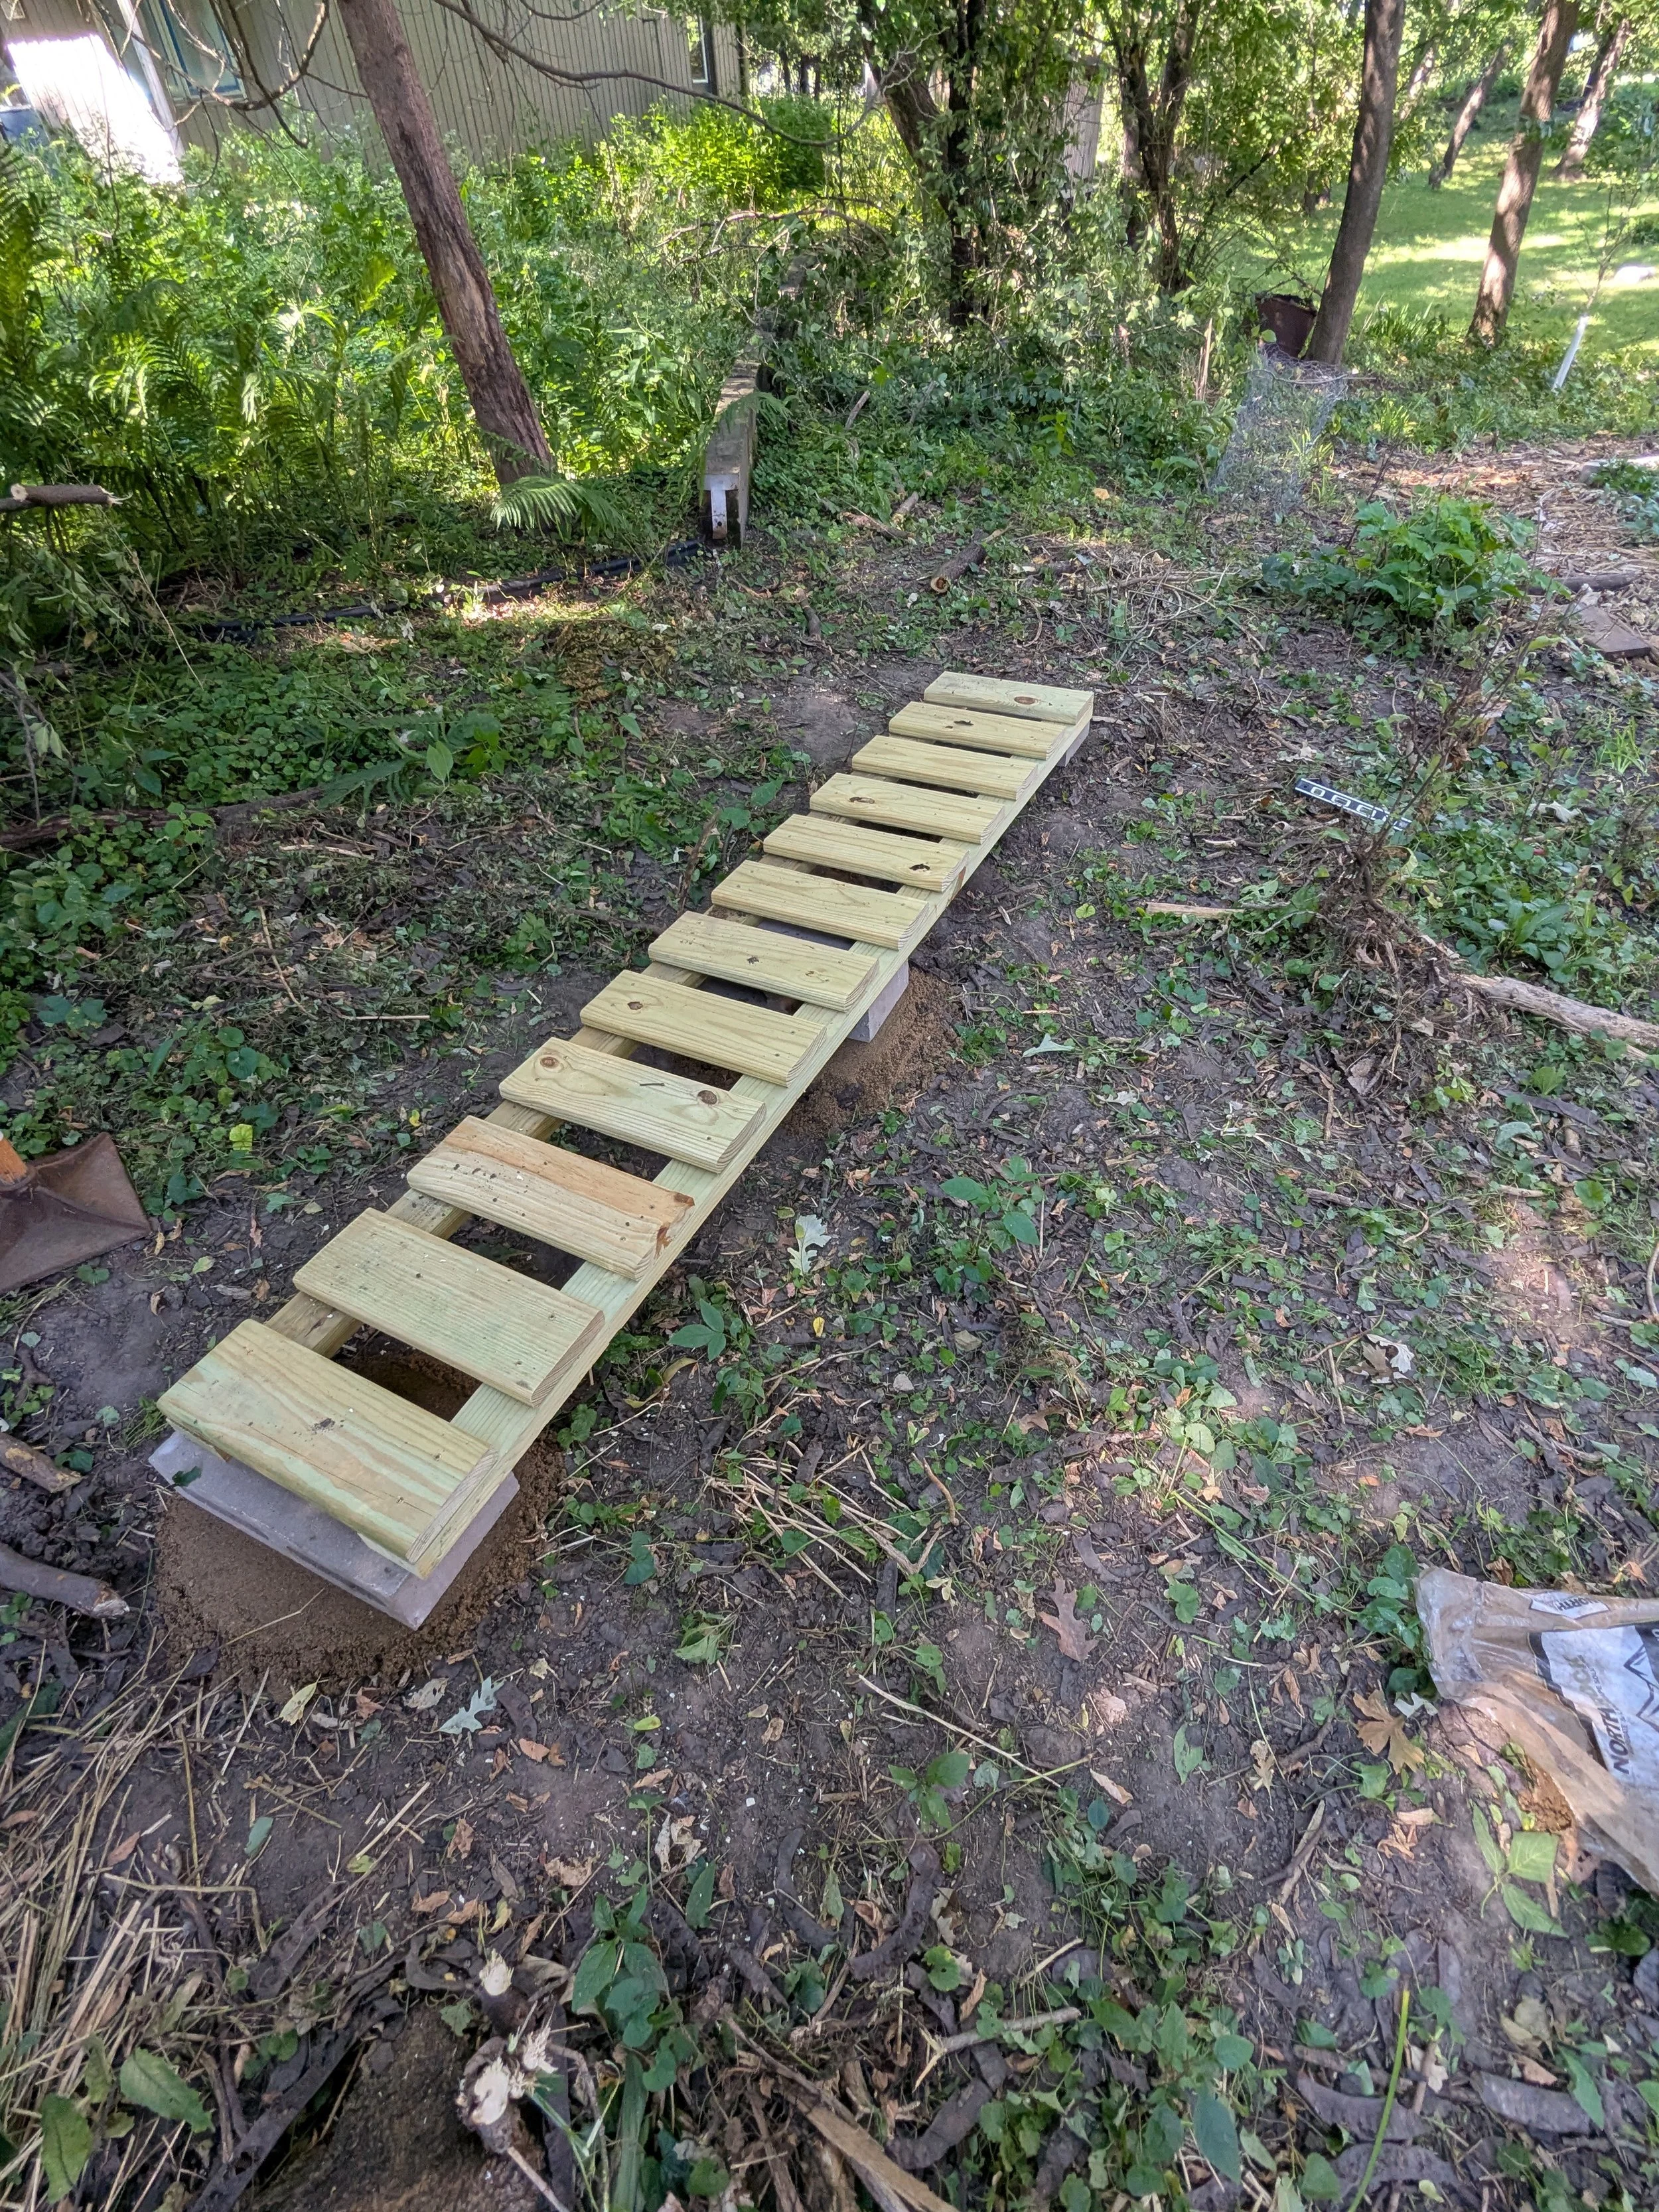
Floor frame set on the blocks, site cleared
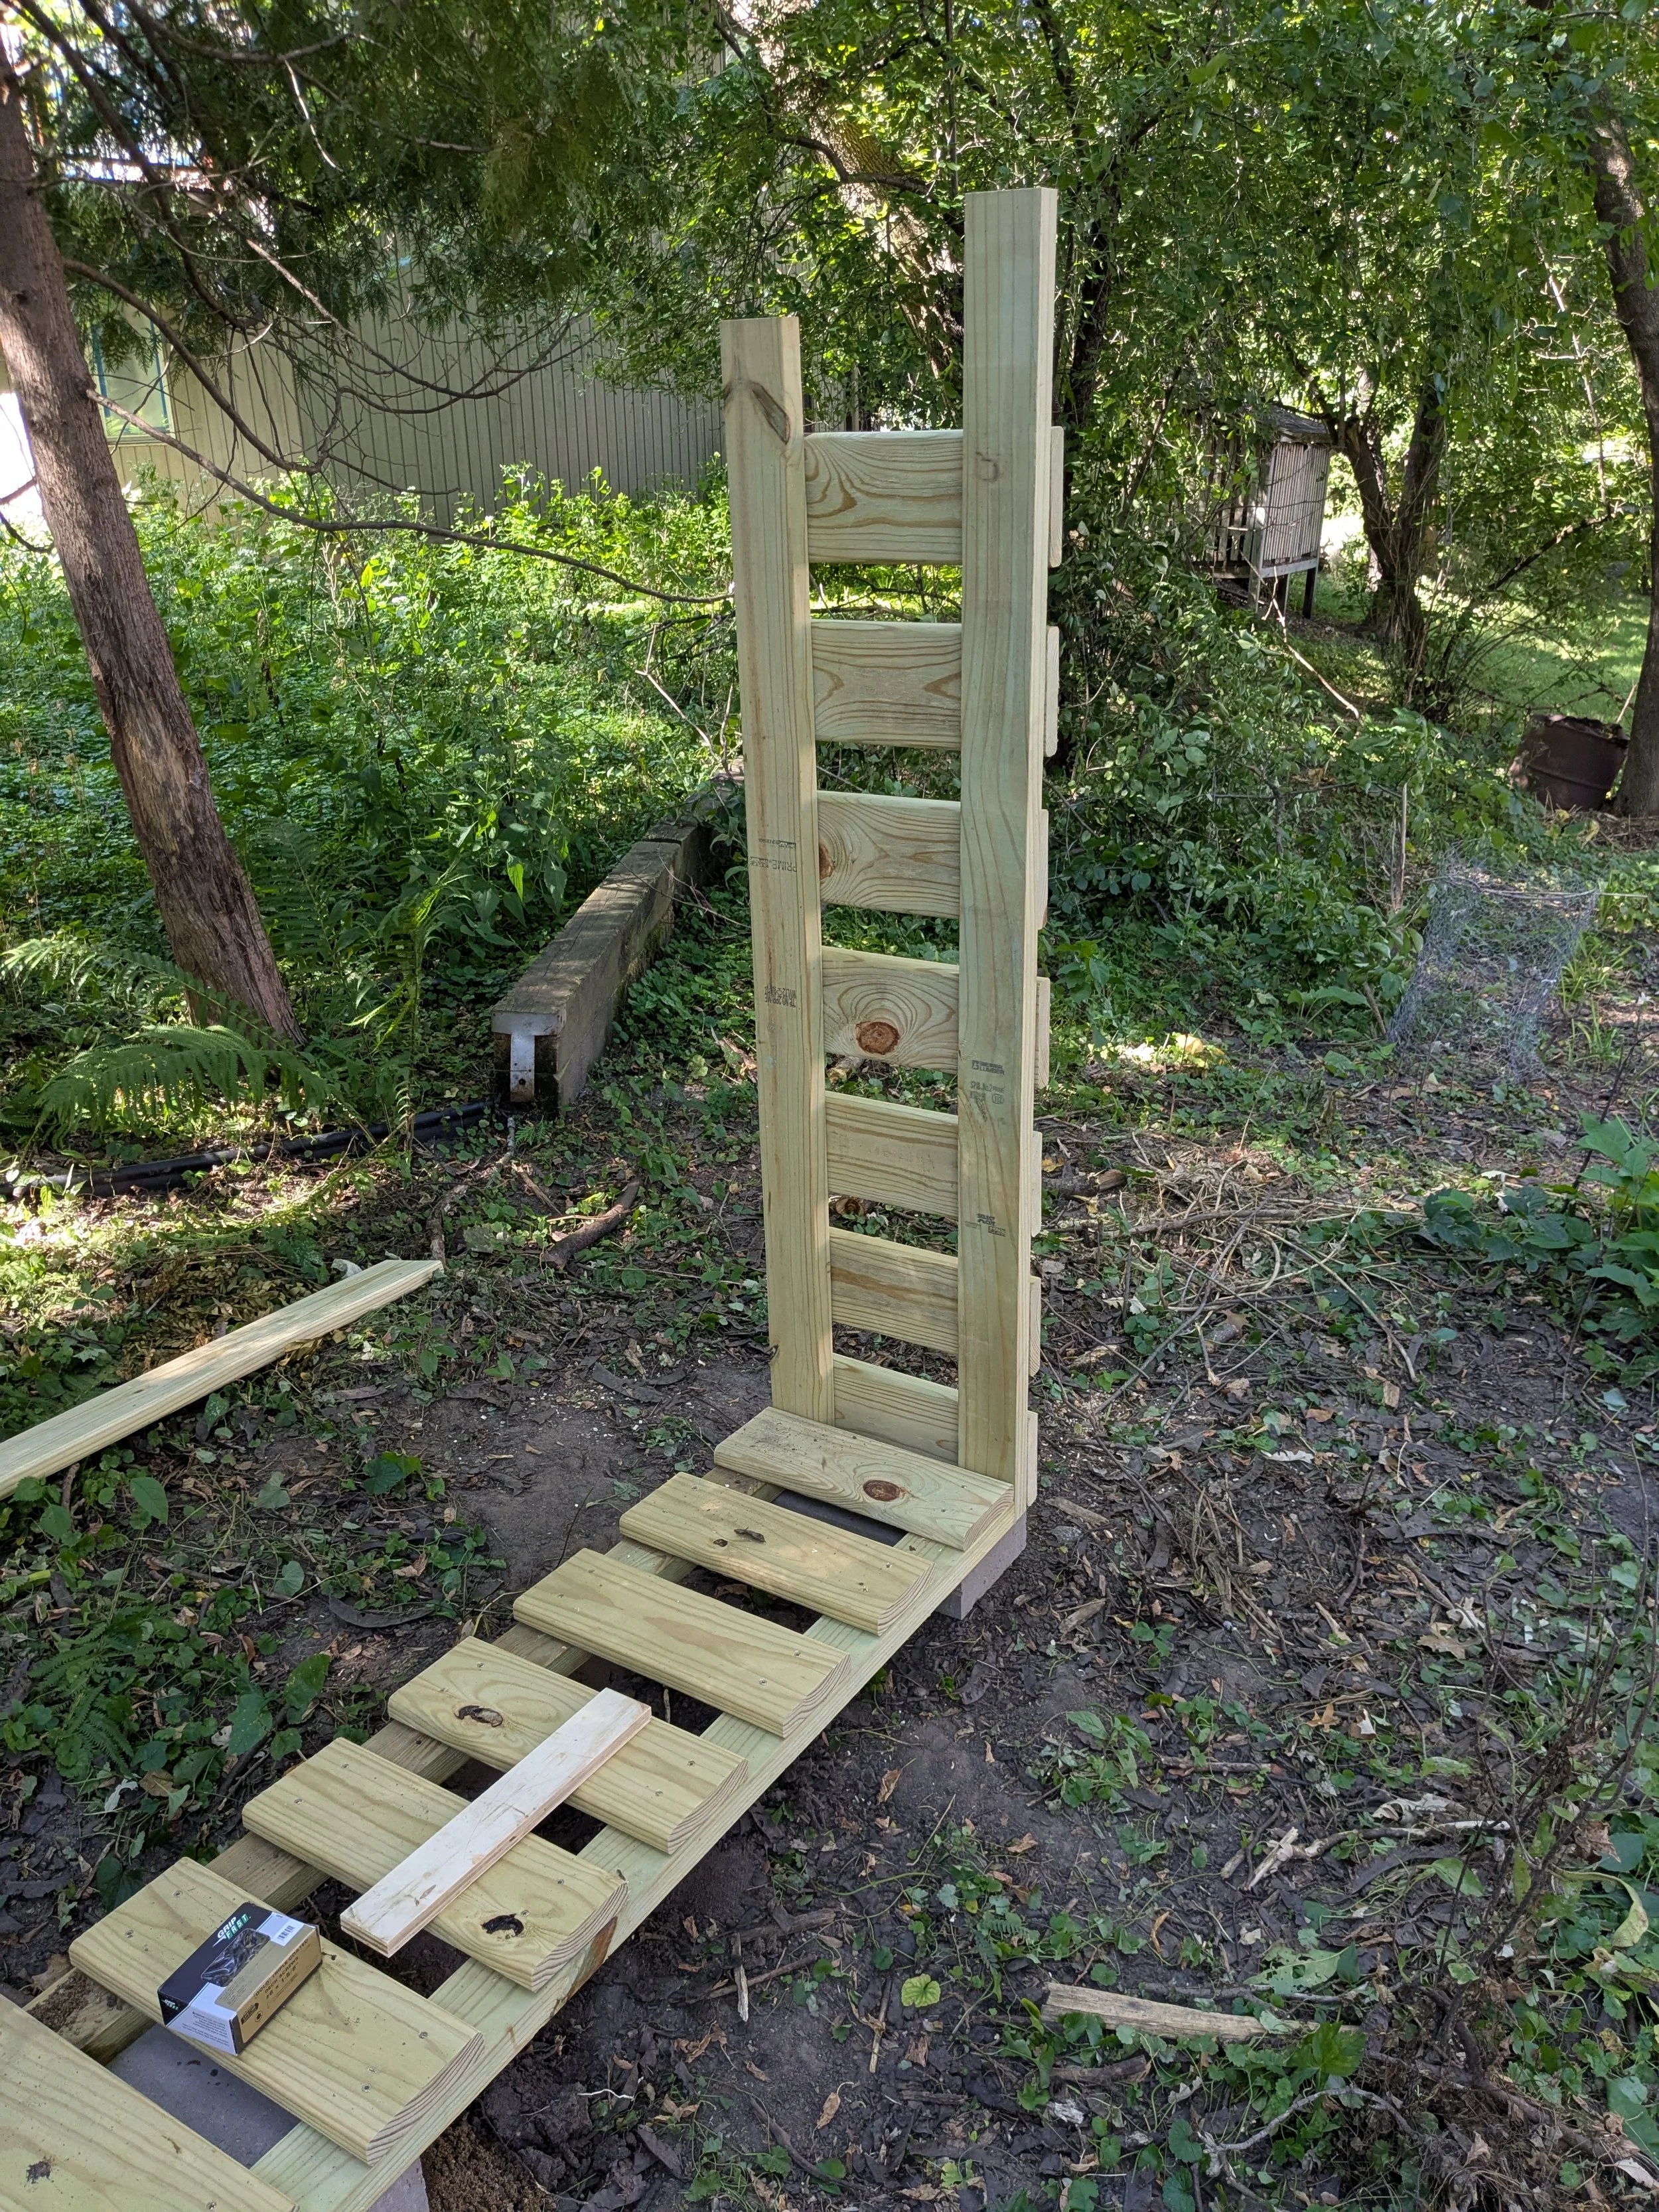
First side frame standing on the floor
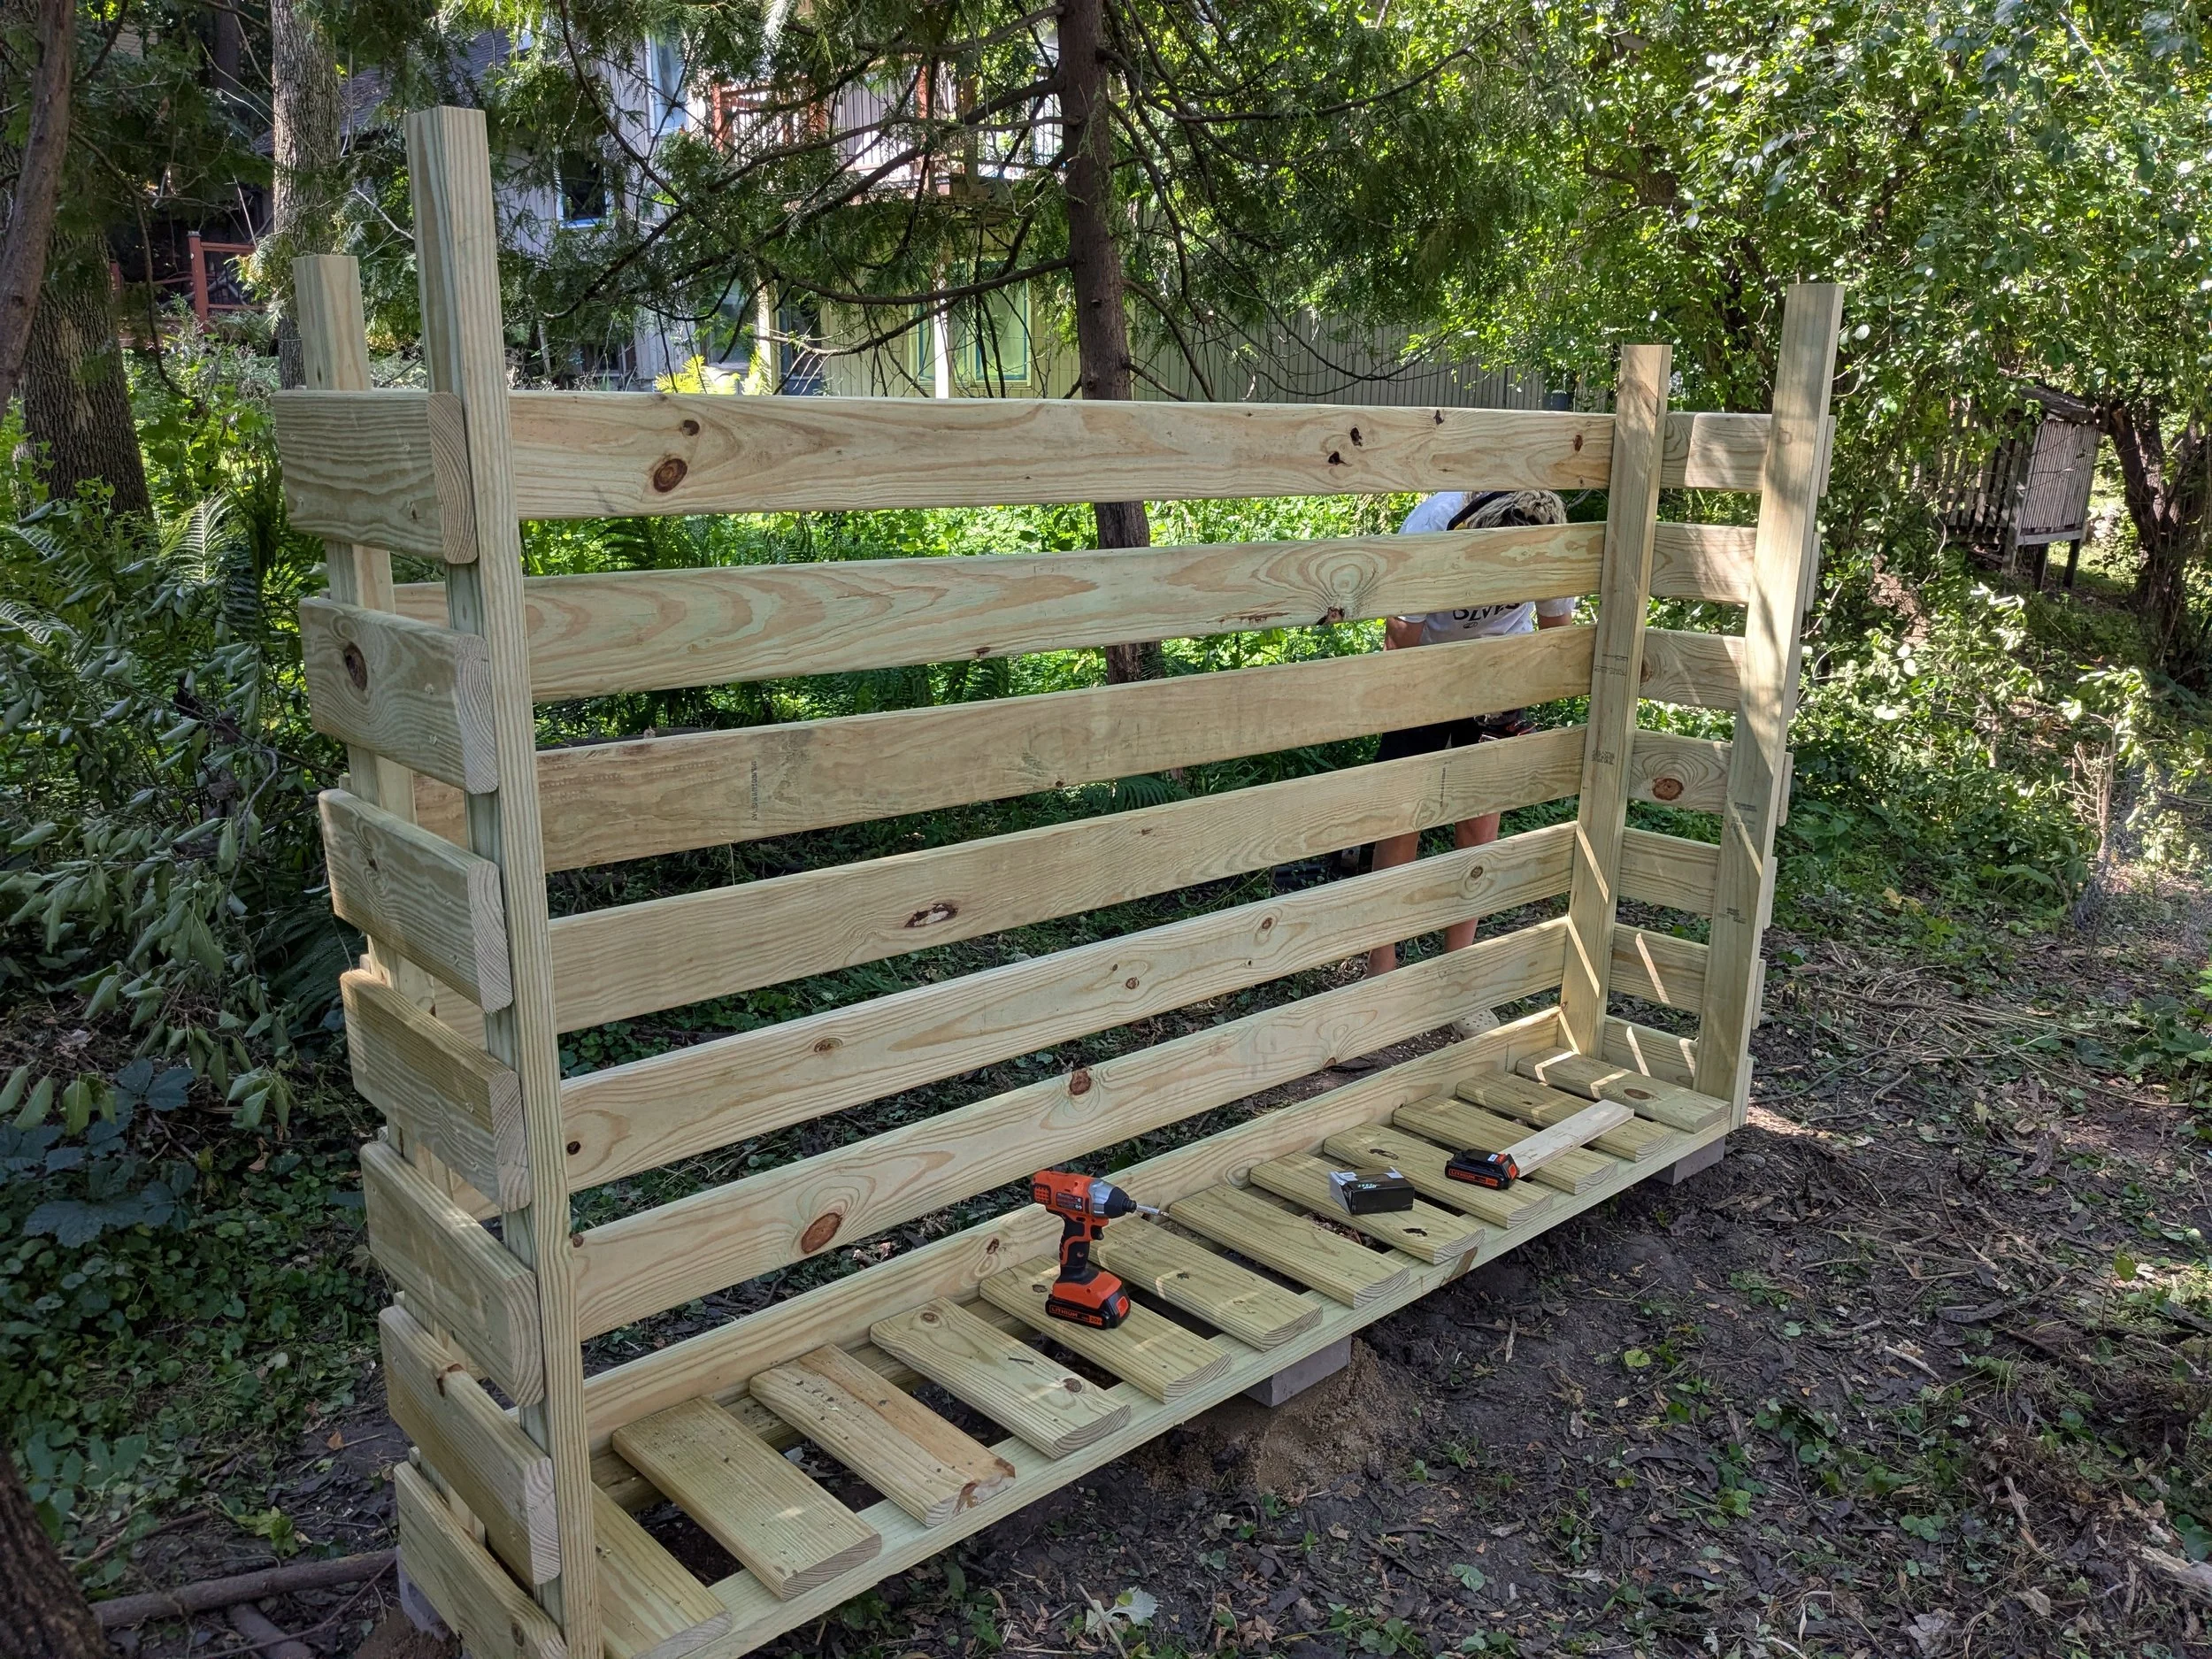
Both sides up with back slats in
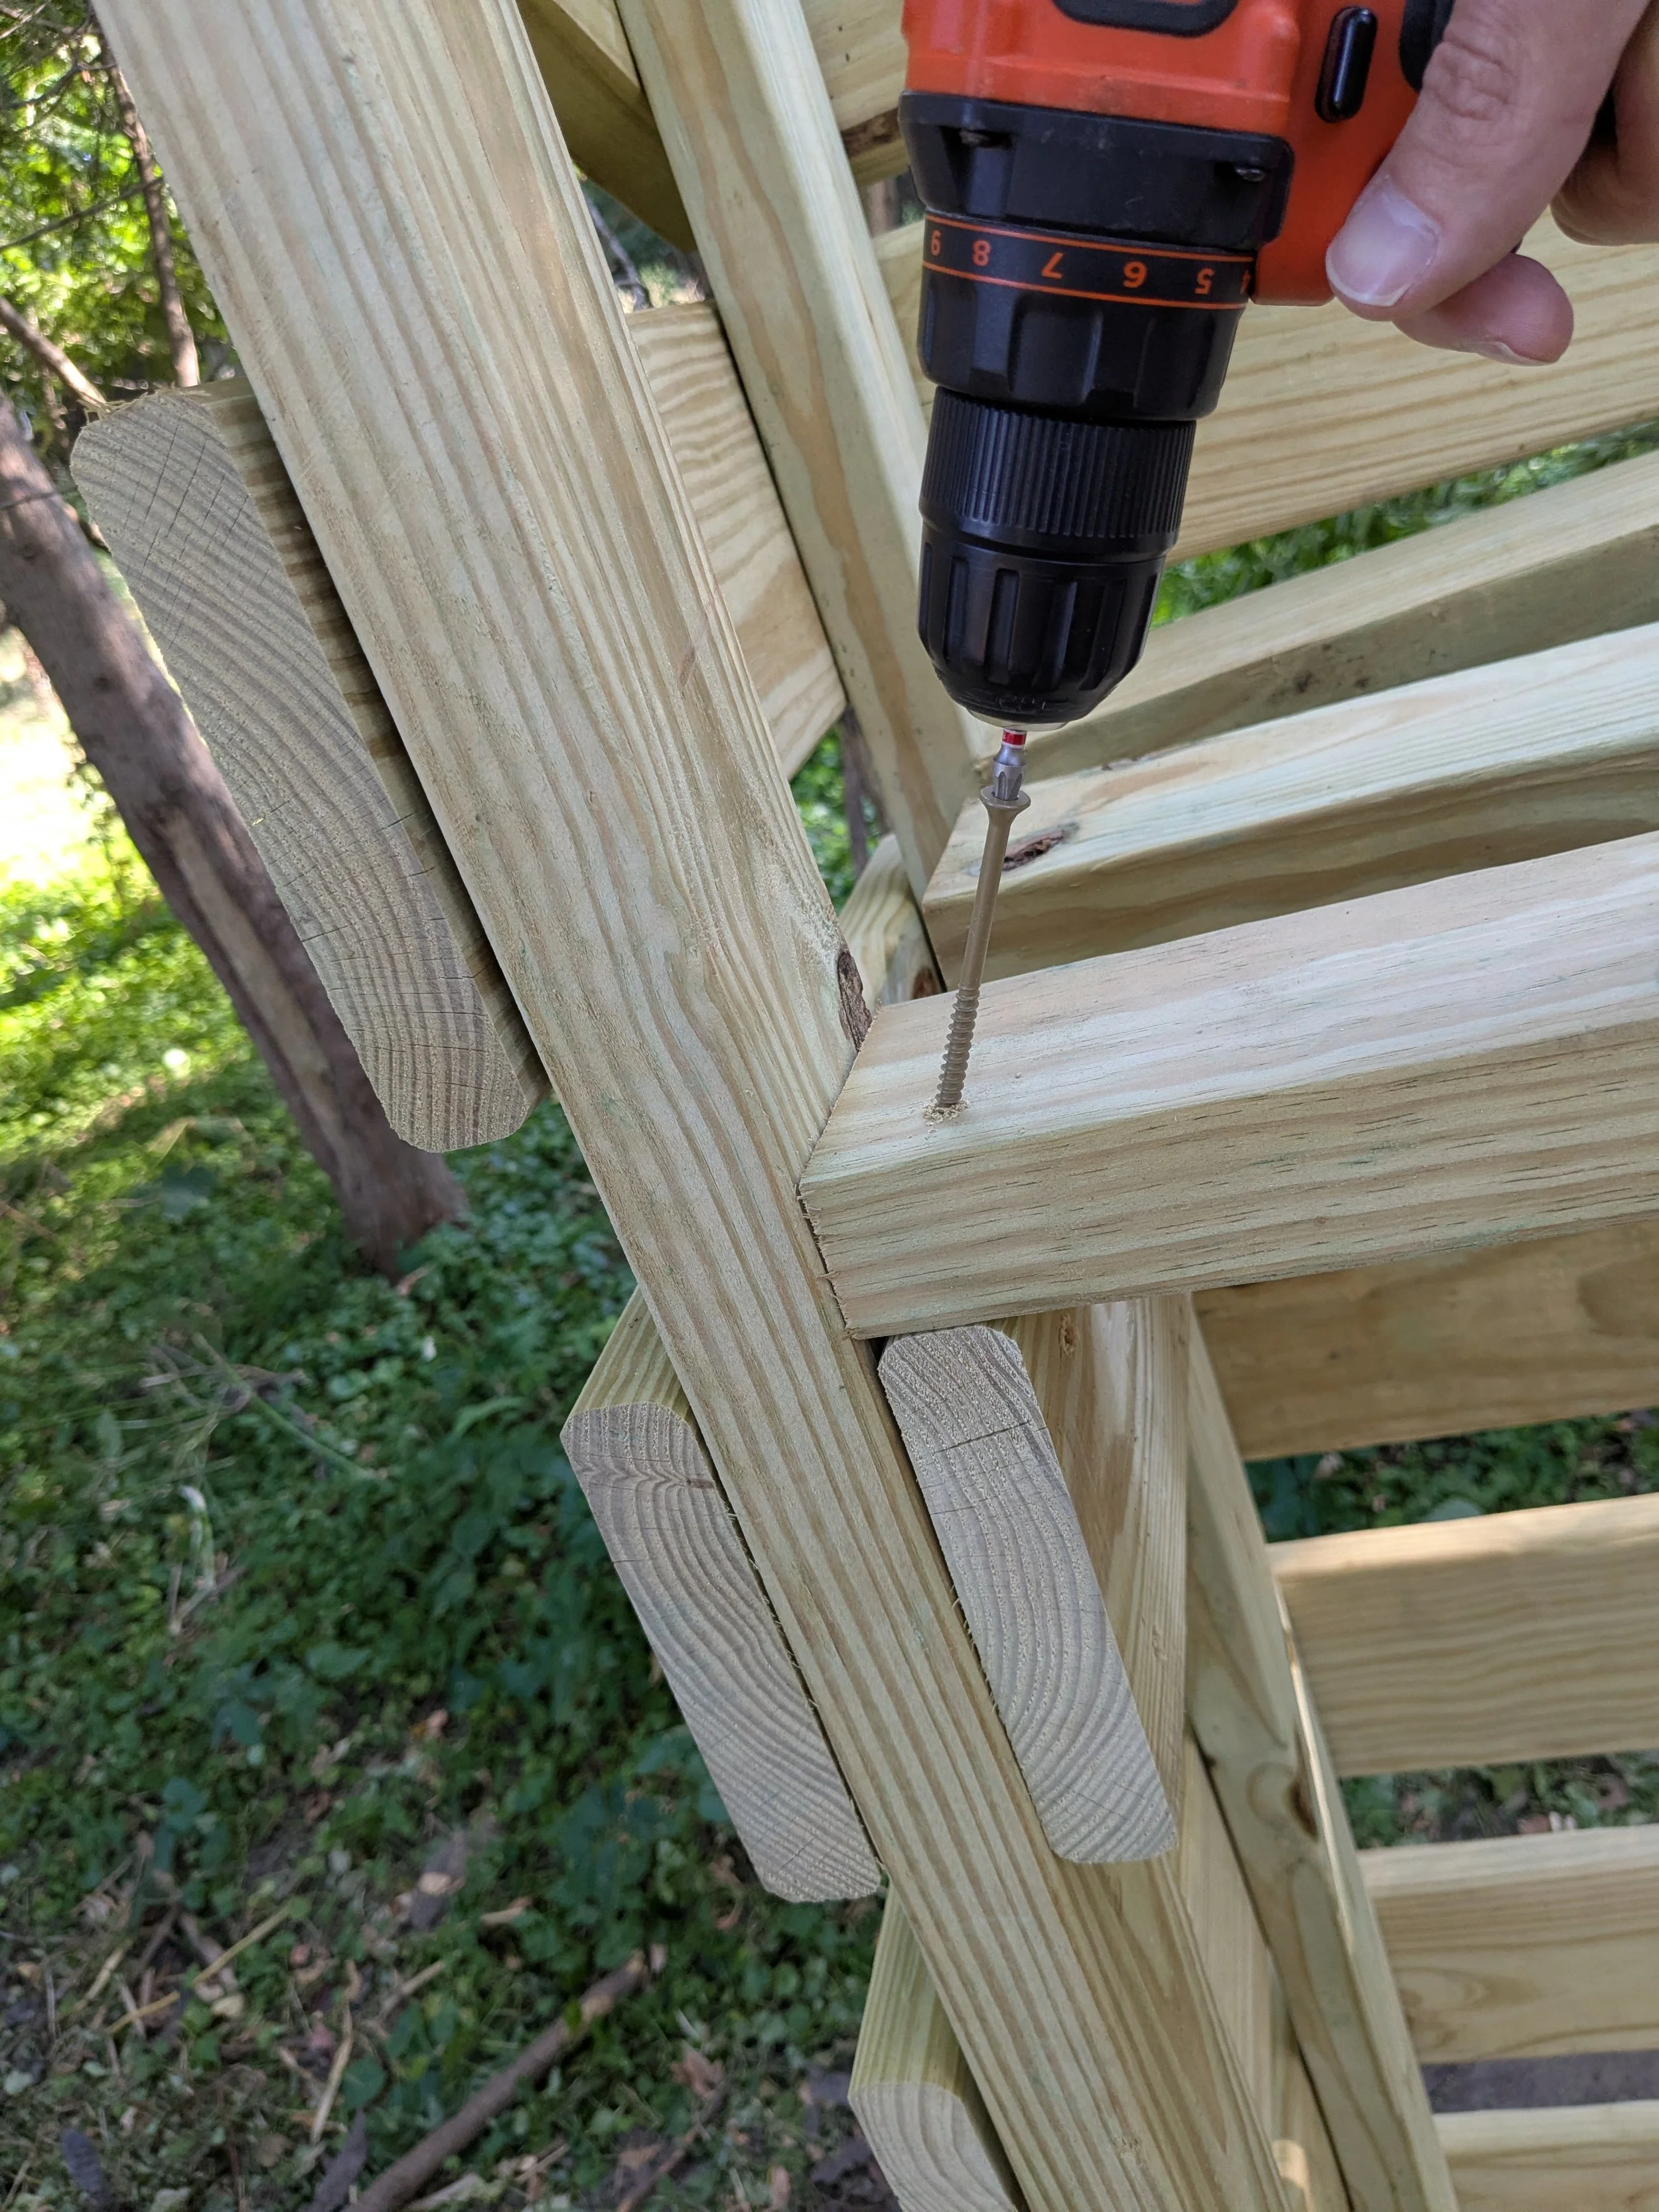
Driving a screw into the shelf and frame
Five Things I'd Tell Anyone Building This
1. Make a spacer block first. Cut a 12-inch piece of 2x4 offcut and use it to set every single slat gap — floor, sides, back. Sixty-some slats, zero measuring. This is the single reason the shed looks even and the reason it goes up so fast. If you measure each gap off a tape instead, you'll end up with a shed that's 15¾ inches deep in one place and 16¼ in another.
2. Cut all 28 slats in one session with a stop block. Part B is more than half the wood you'll handle. Clamp a stop to your miter saw fence and run them all at once. Identical pieces are what make the difference between a shed and a pile.
3. Brush preservative on every cut end. Pressure treatment only penetrates so far — the middle of the board is bare wood, and a fresh cut end is the first place rot starts. Five minutes with a brush buys you years.
4. Pre-drill the roof panels 1/16 inch oversize and don't crank the screws. Corrugated plastic moves a surprising amount between a January morning and a July afternoon. A screw through a tight hole will crack the panel the first time it does. Fasten through the flat where the panel bears on wood, and stop as soon as the washer compresses.
5. Anchor it. A loaded shed isn't going anywhere. An empty one, with a 102 × 22 inch roof acting as a sail, is a different animal — and empty season is windy season. A few rebar stakes and a pipe strap, or a pair of screw-in earth anchors. Keeping one row of wood in it year-round is the best anchor there is.
How Much Wood It Actually Holds
The main bay is 96 inches wide, 16 inches deep, and about 45 inches of clear height under the shelf. That's a hair over 40 cubic feet — almost exactly a standard 4 × 8 face cord of 16-inch splits, or roughly a third of a full cord.
If you burn a full cord a season, this shed is about four months of wood. Two of them side by side, with a few inches of air between, will carry most of a Minnesota winter.
Stacking tips: split face up and bark down (bark sheds water, and you want the split face exposed to air). Leave a finger's width between rows. Don't pack the ends tight against the side slats — the gaps only work if air can get past the wood.
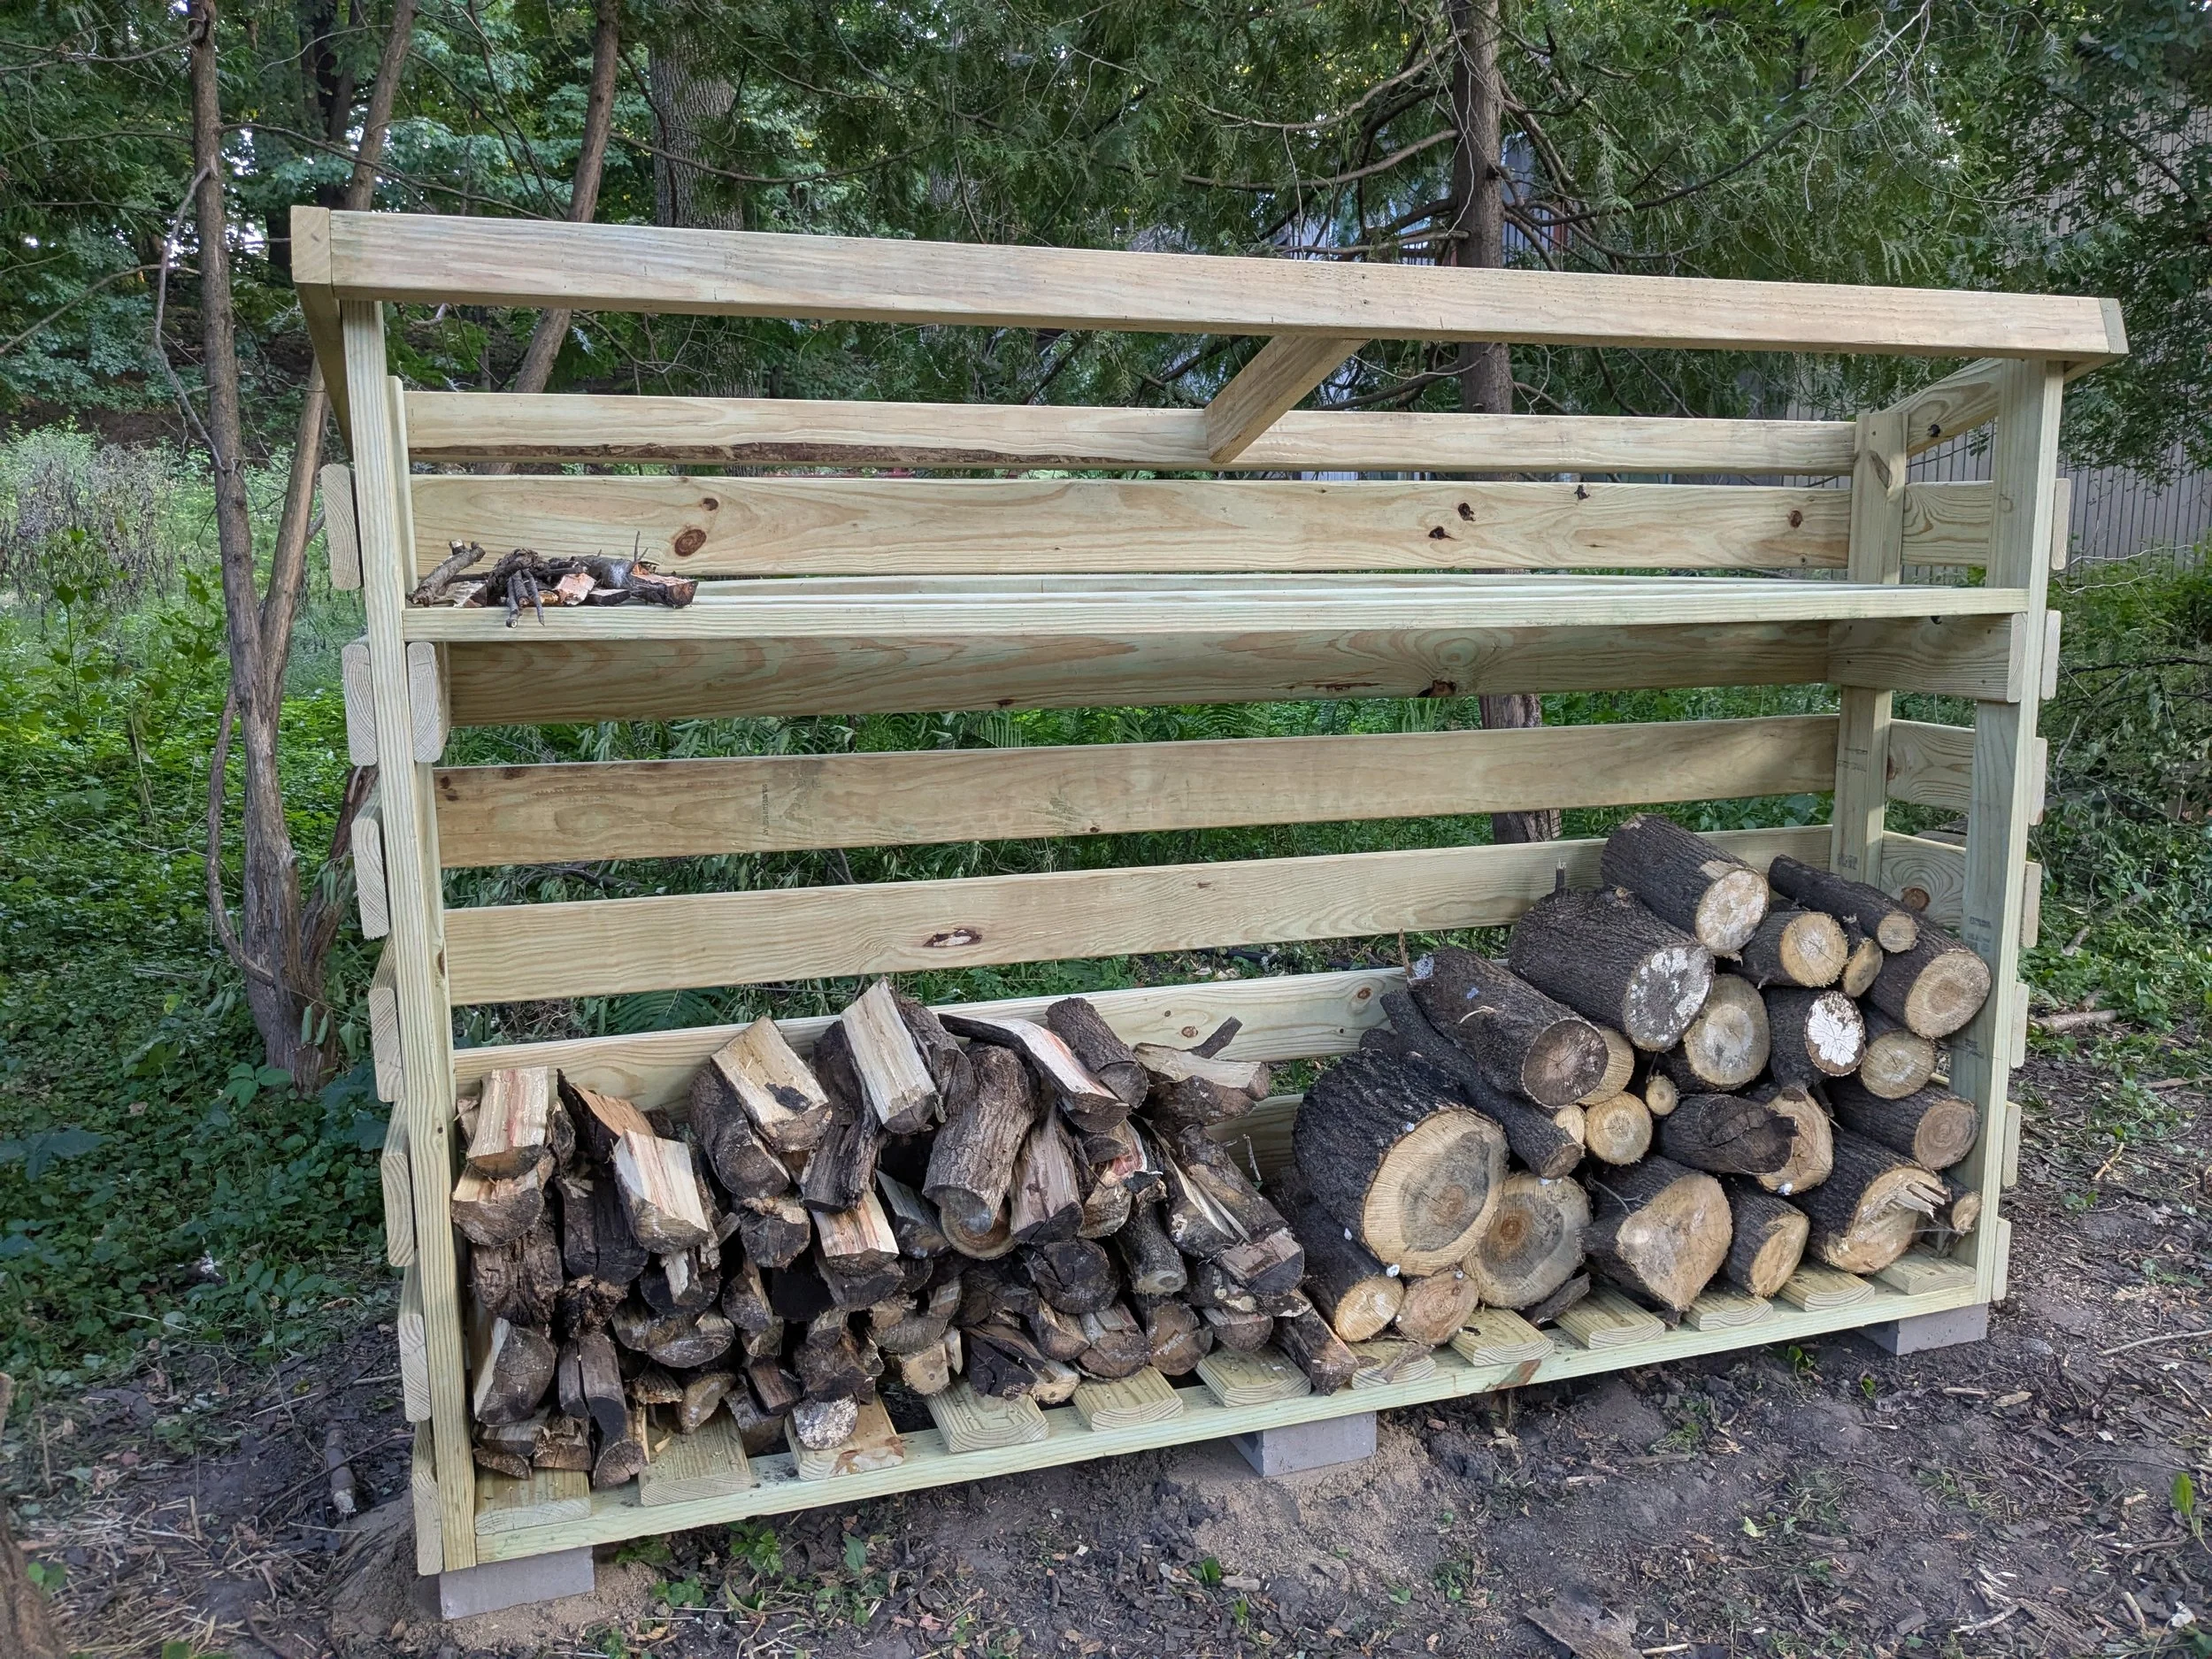
Firewood shed partially loaded with split wood (roof not shown)
FAQ
Can I build this by myself? Yes, except for two moments: standing the side frames on the floor, and setting the roof frame. Working alone, screw a temporary diagonal brace to each side frame to hold it upright, and clamp a pair of scrap ledges to the front uprights so the roof frame has somewhere to rest while you fasten it.
Do I have to use pressure-treated lumber? For the floor runners and the uprights, yes. Untreated pine under a wet stack of wood will be soft in three years. Cedar is a fine substitute if it's cheap where you live.
Can I skip the concrete blocks and set it on the ground? You can, but don't. Ground contact is what rots the runners, and the blocks keep the bottom row out of splash-back and snow. Three blocks cost about five dollars.
Do I need a permit? Almost nowhere — it's an unenclosed storage structure well under any typical threshold. Check your local rules and any HOA covenants if you're unsure.
How long will it last? Treated lumber, off the ground, under a roof, with the cut ends treated: twenty years is reasonable. The roof panels will yellow and go brittle first — figure on replacing those once in that span.
How wide can I make it? Eight feet is the sweet spot because everything comes off standard stock with almost no waste. Go much past that and the 96-inch shelf rails start to sag. If you need more storage, build two and set them side by side.
Get the Complete Plans
Everything above is the what. The plans are the how.
The full Firewood Shed PDF is a 30+ page, print-ready document with:
A complete cut list — 8 parts, 49 pieces, every length called out
Cutting diagrams showing exactly which part comes out of which board, laid out for near-zero waste
Dimensioned CAD elevations — front, back, side, and every sub-assembly
12 numbered steps with photos from the actual build
A shopping list with real prices and a printable cut-list checklist for the wall over your saw
Site prep, leveling, anchoring, roofing, and stacking guidance
Instant download. Print it, take it to the garage, get it sawdusty.
If something in the plans isn't clear once you're building, message me. I answer every one, and every question makes the next revision better.
Built one? I'd love to see it — tag me or send a photo. And if you're looking for your next weekend project, the Modular Bathroom Vanity plans are the most-downloaded thing in the shop.